Angles and Lighting
Tips for Nailing the Angles on the Glitter Blow:
Considering your angles and playing with lighting can be incredibly fun as well as crucial to getting a great image. We've got two examples of great glitter from the same shoot, different models but same lighting and set. We want to note that neither of these photos are perfect, they have rough edits and just enough to show the points we'd like to make without being distracted.
1. In both the photos the general lighting is the same, you want to make sure like any other shoot, your model is well lit and within a reasonable bracket that you're not losing your whites or blacks. This is pretty important as glitter can get over exposed and you will lose color quickly. Shooting with a histogram showing on playback can help.
2.Make sure you use a large flake glitter (we like craft as it's relatively cheap, we went for glitter snow and it's the same in all images on this page), the larger the flake the more surface area your glitter has to bounce light and the bigger the sparkle. It's physics!

|
3. Find different small lights, we used a halogen and if you can get your hands on some of these dying species we highly recommend you do. Small lights you can use for directional play can make a huge difference!
4. Start considering angles! This is where you can start seeing a large difference by something so small between these two images. Let's break this down a bit more. |
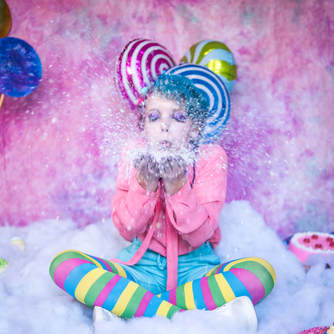
In this image, our model is straight-on, she's facing the camera. While with a few tweaks this could be an exceptional image, we do lose quite a bit of her face with a magnificent cloud of glitter snow. There's no extra light so while the glitter will bounce the light that's around, it's not getting any extra help to boost the reflective property it's known for.
This can be fun for many images, if you want an air of mystery or just a good backdrop, a simple glitter blow is always nice for everyone. You can experiment with different flake sizes and colors for more effects as well. |
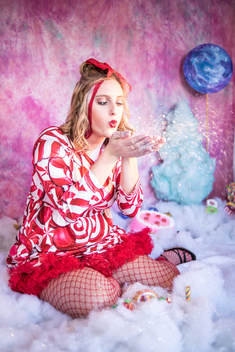
With this image, you can see that it's exposed just slightly lower to compensate for the glitter, which is in fact the same glitter snow. Our model is also just slightly shifted so that you can see more of her face which helps add to the image (especially if someone did a lot of work on the makeup). You might note that the glitter is much warmer, it almost looks like fireworks, welding sparks or something else incredible. This effect is in camera and thanks to the halogen bulb we had placed in front, to the side, and aimed at the models hands. It requires adjusting to your preferred position which means more work but it adds to the image in a different way. Try positioning your model at different angles with the light and play around to find what best suits you, different angles with the model and definitely the light give very different looks.
|

|
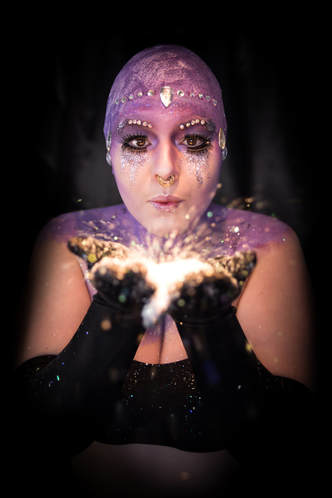
In this first image, you can see the halogen at the top, it's directionally facing away from the model to not overexpose her face. This light is coming down instead of coming from the side to emphasize the handful of glitter exploding up rather than aiming at the glitter from the side. This technique is very similar to backlighting, the same used in rain and snow photo shots. Backlighting can be incredibly useful if you want gorgeous silhouettes, add a general light first and you can have pictures that just explode. Here is one more image from the same series.
|
|